A hanging toiletry organizer looks simple when it is closed. Open it, and the product becomes a compact storage system: hook, hinge lines, pockets, elastic retainers, zippers, lining, trim and a handle all have to work together. For a buyer, the fastest route to a useful sample is to define that system before discussing colours or logo placement.
This checklist turns the first inquiry into nine practical decisions. It is written for travel brands, hospitality programs, promotional buyers and retailers developing a private-label organizer. Use it with the HENRY hanging toiletry organizer reference, then record every project-specific choice in your RFQ and sample comments.
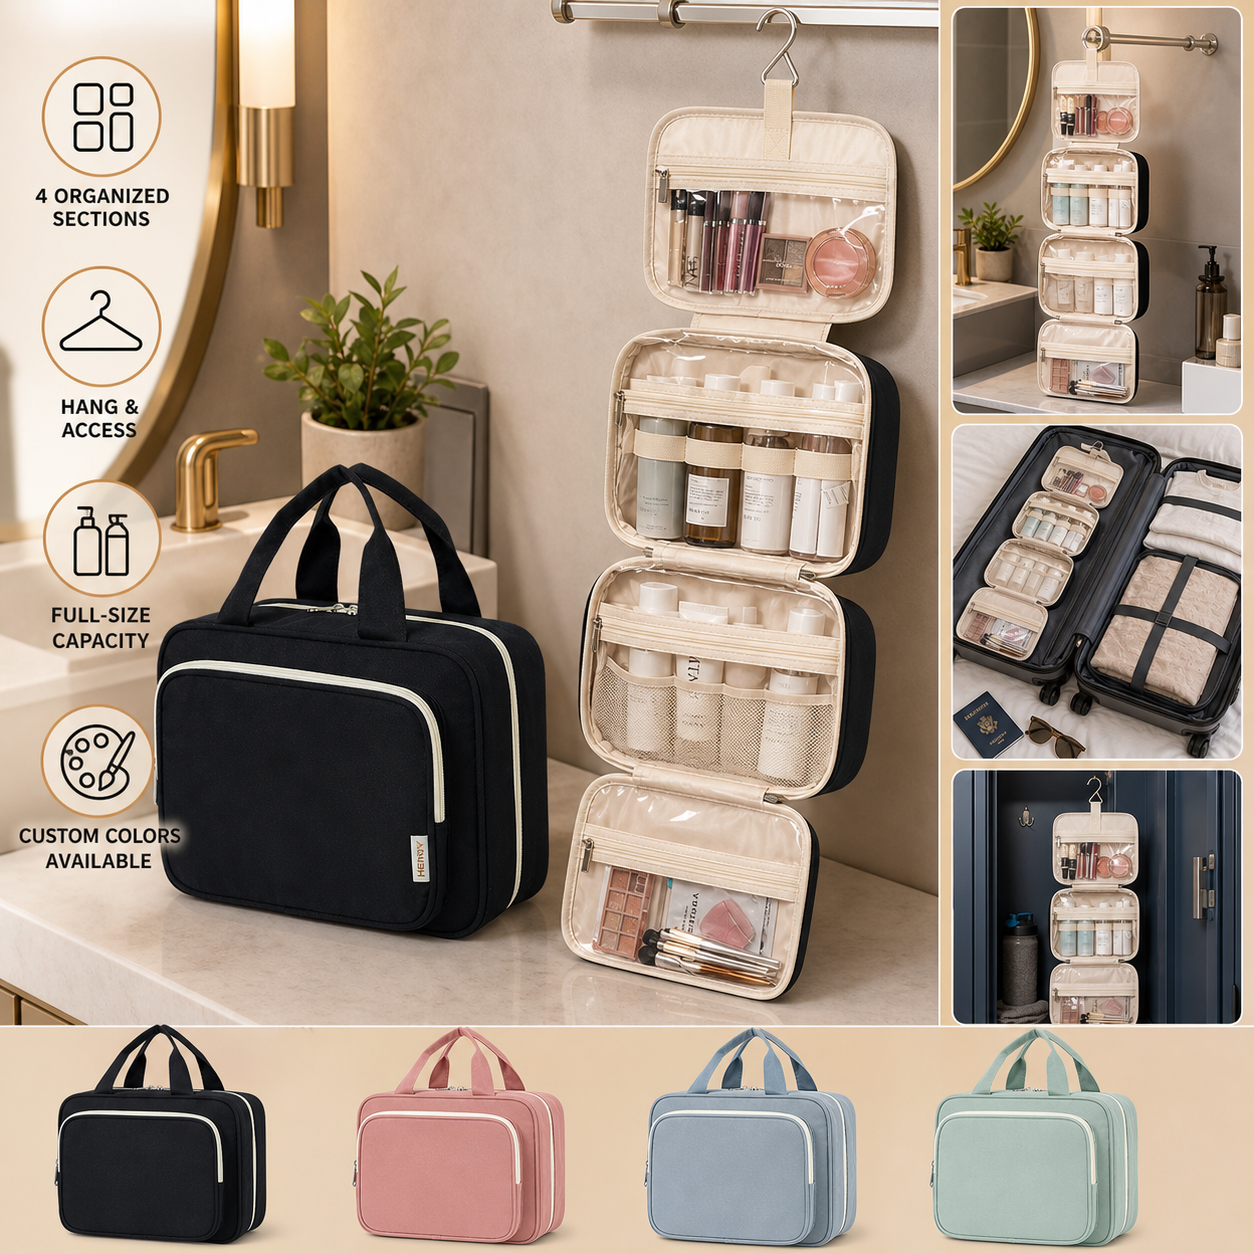
1. Start with the packing routine
List what the organizer must carry and where it will normally be opened. A hotel bathroom, gym locker and family travel kit create different priorities. Buyers should identify tall bottles, small cosmetics, brushes, grooming tools and items that need quick access.
Avoid beginning with a generic request for “many pockets.” Instead, describe the packing routine. That lets the compartment plan follow real objects rather than an arbitrary pocket count.
2. Define the closed and open formats
Specify the target closed dimensions, the maximum open length and the preferred fold direction. The organizer should close without forcing bottles into the hinge line or creating a bulky centre stack.
For the first sample, request photos of the organizer empty, packed, closed and hanging. These views make it easier to judge whether the product remains compact while still presenting its contents clearly.
3. Map every storage section
The launched HENRY reference shows a four-section direction for separating larger bottles, cosmetics, brushes and smaller essentials. Treat that as a reference layout, not a universal rule. Your project may need fewer large sections, more small pockets or a removable pouch.
Create a simple compartment map with a name, intended item and approximate opening size for each section. Mark which pockets need visibility, which need privacy and which should remain reachable while the organizer is hanging.
4. Choose the hook and hanging position
The hook must suit the intended environment and the folded product. Define whether it should rotate, fold away or sit in a dedicated recess. Confirm that the organizer hangs flat enough for the pockets to stay usable.
Do not approve the hook by appearance alone. During sample review, load the organizer with representative items and check how the hook, top panel and stitching behave. Any load or durability requirement should be written into an agreed test method rather than assumed from a visual sample.
5. Specify pocket visibility and retention
Mesh, transparent film, elastic loops and opaque fabric each solve a different problem. Mesh helps buyers see contents; elastic can hold narrow items; opaque pockets hide personal items; zip closures reduce accidental spill-out.
Define the opening direction and retention method for every section. A pocket that looks neat on a flat drawing may be awkward once the organizer is vertical. Review access with one hand and with the organizer packed.
6. Freeze materials and colour as a system
The body fabric, lining, mesh, binding, zipper tape, puller and thread should be specified together. A colour reference should identify each component, not only the outer shell. If exact colour matching matters, agree on the reference standard and review a physical sample under consistent lighting.
Custom colours, trims and materials remain development requests. Availability and appearance depend on design review, sampling, MOQ and the final specification. Do not treat a digital swatch as production approval.
7. Plan cleaning and moisture handling honestly
Toiletry products may encounter damp items or small spills, but that does not make every organizer waterproof. Define the cleaning expectation, lining construction and any coating request. If containment or water-resistance matters, record the exact construction and test method required for the project.
The safest product copy describes verified materials and features, while performance language remains conditional until a sample and test result support it.
8. Place branding after the fold lines are known
Logo placement should remain visible when the organizer is closed and should not interfere with zippers, binding or folds. Provide vector artwork, target dimensions, colour references and a placement drawing.
Ask the supplier to show the branding on both the flat component and the assembled sample. Embroidery, print, patch and label options interact differently with the selected fabric, pocket construction and order quantity.
9. Approve the sample with a repeatable checklist
Record the sample version and review it in the same order every time:
- confirm closed and open dimensions;
- pack the agreed representative items;
- check pocket access while hanging;
- verify hook, handle, zipper and fold operation;
- compare component colours and branding placement;
- inspect stitching, binding and pocket alignment;
- confirm labels, packaging and any included accessories;
- list every change as a numbered comment with a photo.
A signed sample should point to the final bill of materials, artwork files and packaging specification. This reduces the risk that an approved visual detail is separated from the component that created it.
Build a quotation-ready brief
Your RFQ should include the use case, closed and open dimensions, compartment map, hook direction, materials, component colours, branding files, packaging and sample acceptance checks. Unknown details can remain open, but they should be labelled as decisions for sampling rather than silently assumed.
HENRY can review a custom organizer brief and help translate it into a sample-ready specification. Start with the custom bag inquiry form and attach your compartment map and artwork.
Frequently asked questions
How many compartments should a hanging toiletry organizer have?
There is no universal number. Choose sections around the items, access pattern and closed size required for the project. The four-section HENRY reference is one verified layout direction, not a rule for every program.
Can the organizer be described as waterproof?
Only when the agreed materials, seams, closures and test method support that claim. Otherwise, describe the verified construction and keep moisture-performance language conditional.
When should logo placement be approved?
Approve it on an assembled sample after fold lines, pocket openings and binding are fixed. A flat artwork preview cannot show every interaction with the finished organizer.
What should a buyer send with the first RFQ?
Send the intended use, target dimensions, packing list, compartment map, material direction, colour references, artwork, packaging requirement and sample-review checklist.
Source and product reference
- HENRY GOOD, Custom Large Hanging Toiletry Organizer, verified four-section reference configuration and conditional customization scope, accessed August 16, 2026.